So I've decided it's time to get the compost out and start again. But how do I do this without losing all my worms? I have no idea if this will work, but here's what I'm doing.
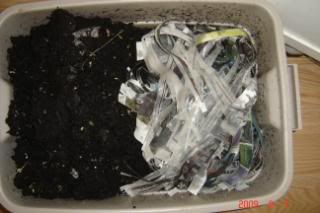
I have pushed all the compost over to one side of the bin. I am not feeding them on that side anymore. My only concern is that it's so heavy, I don't want them squished under the weight. But I have to have faith that instinct will lead them out. On the other, now empty, side of the bin, I have started fresh. I have fed them some moldy strawberries, covered it with several inches of damp newspaper, and voila. The plan is that all the worms will migrate to the new side for food, and I will be left with one side of compost that I can then take out for storage (I won't be using it on my gardens this year, I'll save it for next).
There isn't much to take pictures of, it's hard to see all the worms in a picture. But here is what it looks like with the two sides set up. I figure I'll leave it like this for 2-3 wks to make sure as many worms as possible make it to the other side.


No comments:
Post a Comment