I know it's been ages, but garden season is just about over and it's time to start shutting her down. This year was amazing. My vegetable container garden was so much more successful then I could have hoped for. A few notes for next year.
Start earlier. I'm impatient. This is important for me to come to terms with. I don't like waiting. So I'm already starting to look at some diy cold frame designs and thinking about when, how and where I can start my seeds earlier.
Potatoes - not much I would change. They were awesome! The actual harvests weren't quite as prolific as many web readings suggested they may be, but they fed my family well and were delicious. I have just two pots left, the only veg left in my garden, and I need to use them up this week. Not sure what I want the last dish to be... probably some delicious roast potatoes to go along with the cooler weather (seriously, the weather has to cool down right? +30c in the last weeks of Sept is ridiculous!). I won't bother doing the potatoes in the bag again, the containers worked just as well. Oh I used a whole box of seed potatoes. That seemed like a good amount, although I'd like to try a few different varieties next time for fun.
Herbs - I didn't have a ton of luck with herbs. I also learned I don't use them as much as I thought. Maybe because I think of herbs in more savory hearty dishes like soups and stews, not something we have a lot of in the summer. I might play a bit with trying to grow herbs indoors this winter. Chives were great and I have lots growing around the yard. And I might do basil again. But that's probably it.
Peas - oh yummy peas! I did not have enough peas. Next year I want a big wall of peas. I did six pots worth, three of them died a mysterious early death (the 'early' batch). The last three were great and we snacked well off of them. No big dinners, but nothing beats standing in the yard munching. So I'm thinking nine containers. I did mine in two batches, one two weeks later then the first. And with our crazy weather this year I didn't find it made much difference (plus the first batch died). I'll space them 2wks apart again next year and see what happens.
Beets - fail. Okay, not a total fail, but they didn't do great. I got one dinner for six out of two large containers. I think I oversowed and under-thinned. Plus the big potato leaves covered up one of the containers so stunted the growth. I need a more square container for my own orgnization, and I will use seed tape next year so I don't have to worry about oversowing and under-thinning. And they need to be in front of the potatoes so they get enough sun.
Carrots - much of the same problems as the beets. Oversowed and under-thinned. And the giant zucchini leaves shaded them way too much. The few baby ones we got were sweet and yummy. But seed tape will be the way I go next year.
Spinach - fun early crop. We had a few good salads out of it. Will do again I think.
Lettuce - Blah. Did not like it at all. It was limp and tasteless. My sister-in-law grew some and while visiting we had a salad. It was awesome. Crisp, fresh and full of flavour. I'll have to ask what kind it was.
Peppers - the plants grew well and were a nice decorative feature in my front garden. They did actually fruit, although when we tried to eat them they were horribly bitter. I don't think I'll bother with them again.
Zucchini's - the gem of my garden. I had four plants in a large water trough, and they all did great. We ate them when they were tender little ones, and were able to keep up with the production. Not even enough for baking. Can't think of anything I'd do differently with them next year.
Tomatoes - Oh how I had high hopes for my tomatoes. My favorite vegetable of all. My boys consider them candy! And it was a dismal failure. I had eight plants in all. Six were in the Maxi Kaps, and two in their own pots. The self watering was great, although I was out there watering everything else anyways. The two cherry tomatoes we did get some good snacks from, although again we had crazy weather and they took FOREVER to ripen. The third cherry plant never produced a single one. Then I had four 'Early Girl' plants, your basic medium sized tomato. I'll give Mother Nature the blame for this one, but there was nothing early about these girls. It was late summer before they even started to look ready, and summer was almost over before I could harvest any. Which is when I discovered that the slugs had been feasting. And the little buggers couldn't just eat a whole one at a time. No. They had to go and stick their nasty little slug heads into as many tomatoes as possible. I had all of eight tomatoes. The rest went to compost. So, so, so sad. Next year, I will give a couple regular tomato plants a try, but will focus on cherries. Eight plants seemed like a good number. The little wire cages were not sufficient, especially as they wanted to climb higher and got quite heavy. I will need to do some more serious staking. And I have no idea how I will battle the slugs. So so so sad. And I need to start earlier. Again, this is where the cold frame/green house will come in handy.
My flowers were pretty successful. I need to remember to take a picture before they're all gone. My pansies looked great for a bit, but died early (I overplanted). My sweetpeas grew well, but didn't flower a ton. My cosmos also grew well, but took ages to flower. But now that they're in full flower they are stunning. My snapdragons did not work from seed at all, but when I bought seedlings, they thrived and look fantastic now. My dahlia was smothered by the pansies I planted around it. And my Scarlett Runner Beans stole the show. Easily hit 8ft, and was green and covered with flowers. The beans made an interesting view. I didn't think you could eat them, but it appears I'm wrong and especially in the UK they eat them a lot. Next year I will try some! The only problem with the plant was that it was so big, I needed extra staking (in the form of a large 10ft stake), and it blew over several times. Next year I will stake better from the beginning (a tripod style would look great), and brick the bottom of the container. The marigolds and sunflowers were a bit of a disappointment. Took forever to flower, put on a great show for a week or two then died back again.
Some other notes for next year. I need a better watering system. In the early stages it was so exciting to get out every morning, take my time watering and checking each plant. But by summer it was taking up a lot of precious time first thing in the morning. So some kind of sprinkler or other irrigation system is needed. Starting all the flowers from seed was fun, but it was hard to watch all my neighbors with their flower beds in full bloom when mine were still just sprouting. I may spend the extra money and buy seedlings so I can enjoy them much earlier.
All in all the containers worked better then I could have hoped for. For so many reasons I think they may be better then an in-ground traditional bed. Next year we should still be in this house, and I plan on doing it all over again. Right now I'm bagging up all the soil to overwinter. And next spring I will ammend it and hopefully get another year out of it.
Here are some pictures of the tomato tradgedy. All of these went into the compost. And there is another huge bunch ready for me to take down straight to the compost again. DAMN SLUGS!!!!! You can see in the background everything else is ready for me to prepare to overwinter. It looks so empty and dead back there now. I miss the lush jungle I had!
Thank you so much to those who have followed my garden journey. I hope maybe you learned something with me (even if it's just what not to do!). The days are shorter, and I'm getting back into the swing of sewing, crocheting, baking, crafting etc. With Halloween and Christmas right around the corner, I will have plenty to post about hopefully! And like I mentioned, I might try a little indoor gardening too this winter!
Friday, September 25, 2009
Wednesday, August 26, 2009
DIY fake wasp nest update
So it's been awhile since I first made and hung the fake wasp's nest (see this old post).
I've had many people ask me how they've worked. All in all I'm really happy with them. After a couple months (and a few rains), two of the bags burst and the stuffing fell out. But the bags were still hanging and looked kindof the same so I left them. I have not seen any wasp nests in our yard. I know there's not because I've been looking. I've been looking because there have been quite a few wasps in our yard, especially the last few weeks.
I heard a quick story on the news that Calgary is having quite a battle with wasps this year. Pest companies are extremely busy, and wasps are #1 on their complaint list.
So yes there are many wasps (they love my container garden it seems), but I do feel like I've been successful as there are no nests. We live right next to a large greenspace, so I'm sure there's a ton of nests close to us, but not in my yard!
I will be doing this again next year!
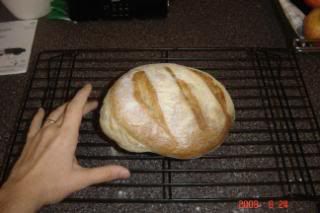
Jen Made Bread!!
Yes I did! We have been trying to make more of our own food and eat less prepackaged and processed food. And something that we eat a lot of is bread. Gareth has been wanting me to try making bread for ages, but I was pretty intimidated. Something about all the kneading, and resting, and punching, and I don't know, it seemed so complicated. My mom lent me a bread maker, but I never did get around to trying that. Then I came across a review of the book Artisan Bread in Five Minutes. That got my attention! I reserved it at the library, but it was so popular I would be waiting a few months. So Gareth surprised me with the book!
And what do you know? I made bread!
I started with the basic recipe, and made a boule loaf. It was small, and a little dense, but it was good!
Then I tried again and made a partial whole wheat loaf, and it turned out much better.
And then I tried a cinnamon raisin loaf. That is one of my favorite breakfast meals. It turned out awesome!!
So I highly recommend that everyone runs out and gets this book. There are a ton of recipes, all with the same basic procedure. But the title is a tad misleading. The main premise is that you make up enough dough for four loaves, then it sits in your fridge for up to two weeks. Mixing the dough doesn't take long at all. But then it needs to rise for two hours, then refrigerated overnight. Then before you bake it, it needs to rest again at room temp for 40min. Bake for 30min. So while you may only be hands on for 5min, there is some preplanning to take in all the rest periods.
But you just can't beat freshly baked bread! (Especially the cinnamon raisin loaf!)
Saturday, August 1, 2009
My potatoes in a bag
For dinner tonight, we harvested the first two hills of potatoes. It was early, so I wasn't sure what to expect. But what did I have to lose?
I decided to dig up the bag of potatoes. Out of all the hills, this was the one I was most curious about how/if it was working.
So here is the bag before, you can just see it under the foliage...
Here is what it looked like on it's own...
I dumped the bag into a bin, dug out the potatoes, then put the dirt back in the bag.
And here are the potatoes! The yield was small, but it was early. These were planted about 10wks ago. Another few weeks and I think the yield would've been much better. But the quality was amazing! We grilled them on the bbq in olive oil, garlic, salt and some onion. My mom and stepdad were here to share in them, which was great considering their contributions to my garden. And hopefully they'll be able to share in many more meals to come. I have 20 more hills!
Vegetable container garden Wk 11 harvest
It has been about 11wks since planting most of my vegetables. And finally we are starting to eat quite a bit from it. First it was spinach and lettuce, both of which are done now, and now we're into the peas and zucchini's. I have four zucchini plants, and it is fruiting like mad. We're also finally getting good sweet yummy peas. I have six pots of peas, three that were planted in one batch, and the other three were planted two weeks later in a second batch. I don't know what happened, but my first batch have all died. I managed to get a few peas off of them, but not much. My second batch seems to be doing much better and I'm getting more peas. We're snacking on about 6 pods/day. Hopefully this is just the beginning, but that may be it with such a small amount of plants. Next year I was to do waaaay more peas. I love love love them!
Here's what we had the other night. Another day or so and we should have that much zucchini again!
And while not a vegetable, I'm excited to say my cosmos have finally bloomed! Those too took about 11wks since I planted the seeds. A little too long to wait, next year I might do a bunch of indoor sowing so I can enjoy them much earlier. There are only a few flowers at this point, but hopefully they'll explode soon!
Homemade worm bin update
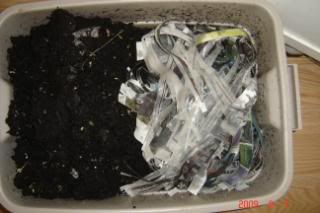
So I haven't mentioned my vermiculture bin (aka DIY worm bin) since I made it. There really hasn't been much to mention. It lives under my sink, I put in a few handfuls of chopped fruit/veg scraps once or twice a week, and you'd never know it was there. There is ZERO smell, no bugs, no escaping worms. But there are a ton of worms. Many more then I started with. Healthy, big, red worms. Probably double at least. And there is compost. Lots and lots of compost! As someone who had know idea what I was doing, I can tell you that it is easy to tell when it's finally turned to compost. The bin is much heavier then when I started, and it's rich, black, moist compost.
So I've decided it's time to get the compost out and start again. But how do I do this without losing all my worms? I have no idea if this will work, but here's what I'm doing.
I have pushed all the compost over to one side of the bin. I am not feeding them on that side anymore. My only concern is that it's so heavy, I don't want them squished under the weight. But I have to have faith that instinct will lead them out. On the other, now empty, side of the bin, I have started fresh. I have fed them some moldy strawberries, covered it with several inches of damp newspaper, and voila. The plan is that all the worms will migrate to the new side for food, and I will be left with one side of compost that I can then take out for storage (I won't be using it on my gardens this year, I'll save it for next).
There isn't much to take pictures of, it's hard to see all the worms in a picture. But here is what it looks like with the two sides set up. I figure I'll leave it like this for 2-3 wks to make sure as many worms as possible make it to the other side.
Wednesday, July 29, 2009
My new purse!
I made something for me! Actually it's not as exciting that it's just for me, but more that I actually got to sit down and start and finish something, in only two days. Gareth very kindly took the boys out this morning to give me the last hour to finish it in peace :)
When I go out with the boys, I now no longer need to carry the big diaper backpack. But my small every day purse is still too small. I needed something inbetween. I have my stuff (which really isn't much), plus snacks, drinks and Roans diaper change kit. And occasionally a few extra items too. I wanted something that I could wear over my body to keep my hands free for child wrangling. And something that was easy for me to just reach in and out of (ie no zipper).
So here is what I made. I found an awesome tutorial on Craftster, and it was actually so easy to complete. I added four inner pockets and a key hook so my keys don't just fall to the bottom of the bag. It closes with a magnetic snap (which is decievingly strong) which is nice that I can sneak my hand in if needed. I interfaced it with a lightweight fusible interface, just enough to give it some structure, yet still be soft and light. This used about 3/4m outer fabric, although I'm glad I got a full metre. I might make a matching zipper pouch to keep my stuff seperate.
Anyways, here she is. I haven't taken her out yet, but wearing around the house has been great!
Subscribe to:
Posts (Atom)